How to Add a Custom Ringtone on iPhone?
Setting a custom ringtone on your iPhone is a great way to personalize your device and easily recognize alerts. While Apple offers built-in tones, you can also add unique sounds to stand out. Here's a step-by-step guide:
If your iPhone is running iOS 26

With iOS 26, setting a custom ringtone is much simpler.
- Open the Files app on your iPhone.
- Long press an MP3 or M4A audio file that's less than 30 seconds long.
- Tap Share in the pop-up menu.
- Scroll down to the actions menu and choose Use as Ringtone.
Earlier iOS versions

If your device is not running iOS 26, you can follow this step-by-step method:
Step 1: Choose or Create a Sound File
First, select or create the sound you want to use. It must be in .m4r format (the iPhone's ringtone and notification sound format) and no longer than 30 seconds.
You can use online tools like Cloud Convert to convert audio files to .m4r format.
You can also edit or create sounds using tools like GarageBand (available on iPhone and Mac) or any audio editing software.
Protip: .m4r is a variant of .m4a. Convert your audio file to .m4a and just replace the a with r and it's done!
Step 2: Transfer the Sound to Your iPhone


- Connect your iPhone to a computer using a USB cable or via WiFi.
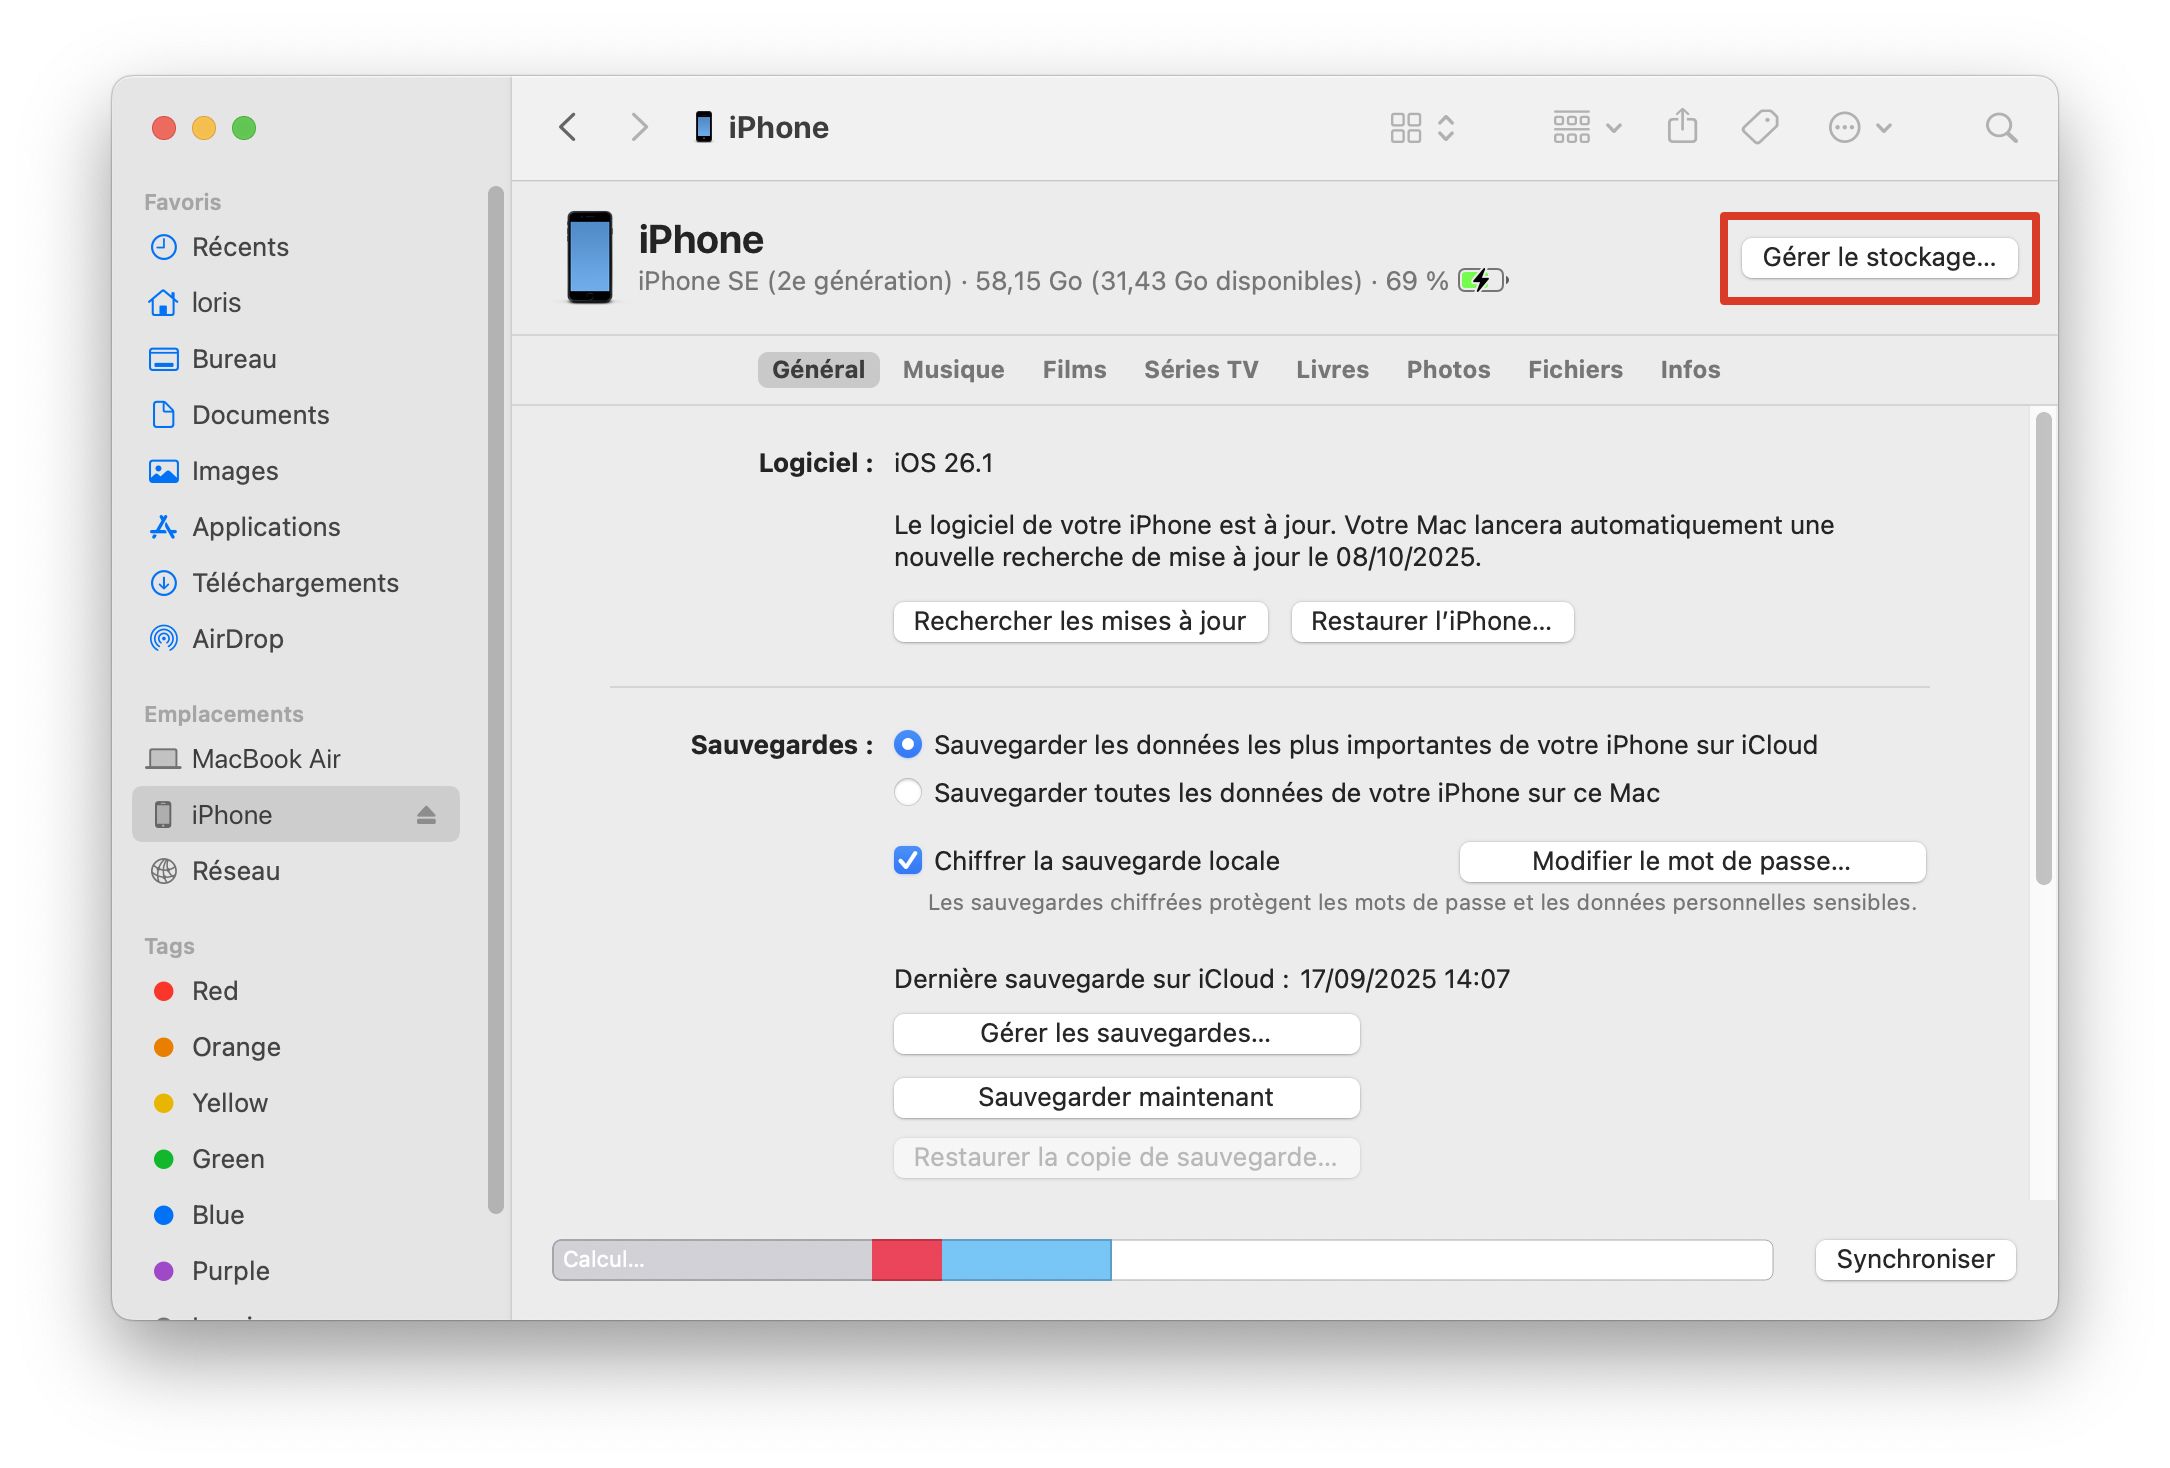
- Open the Finder and select your device from the list in the sidebar of the window.
- Click on the "manage storage" button on the top right of the window.
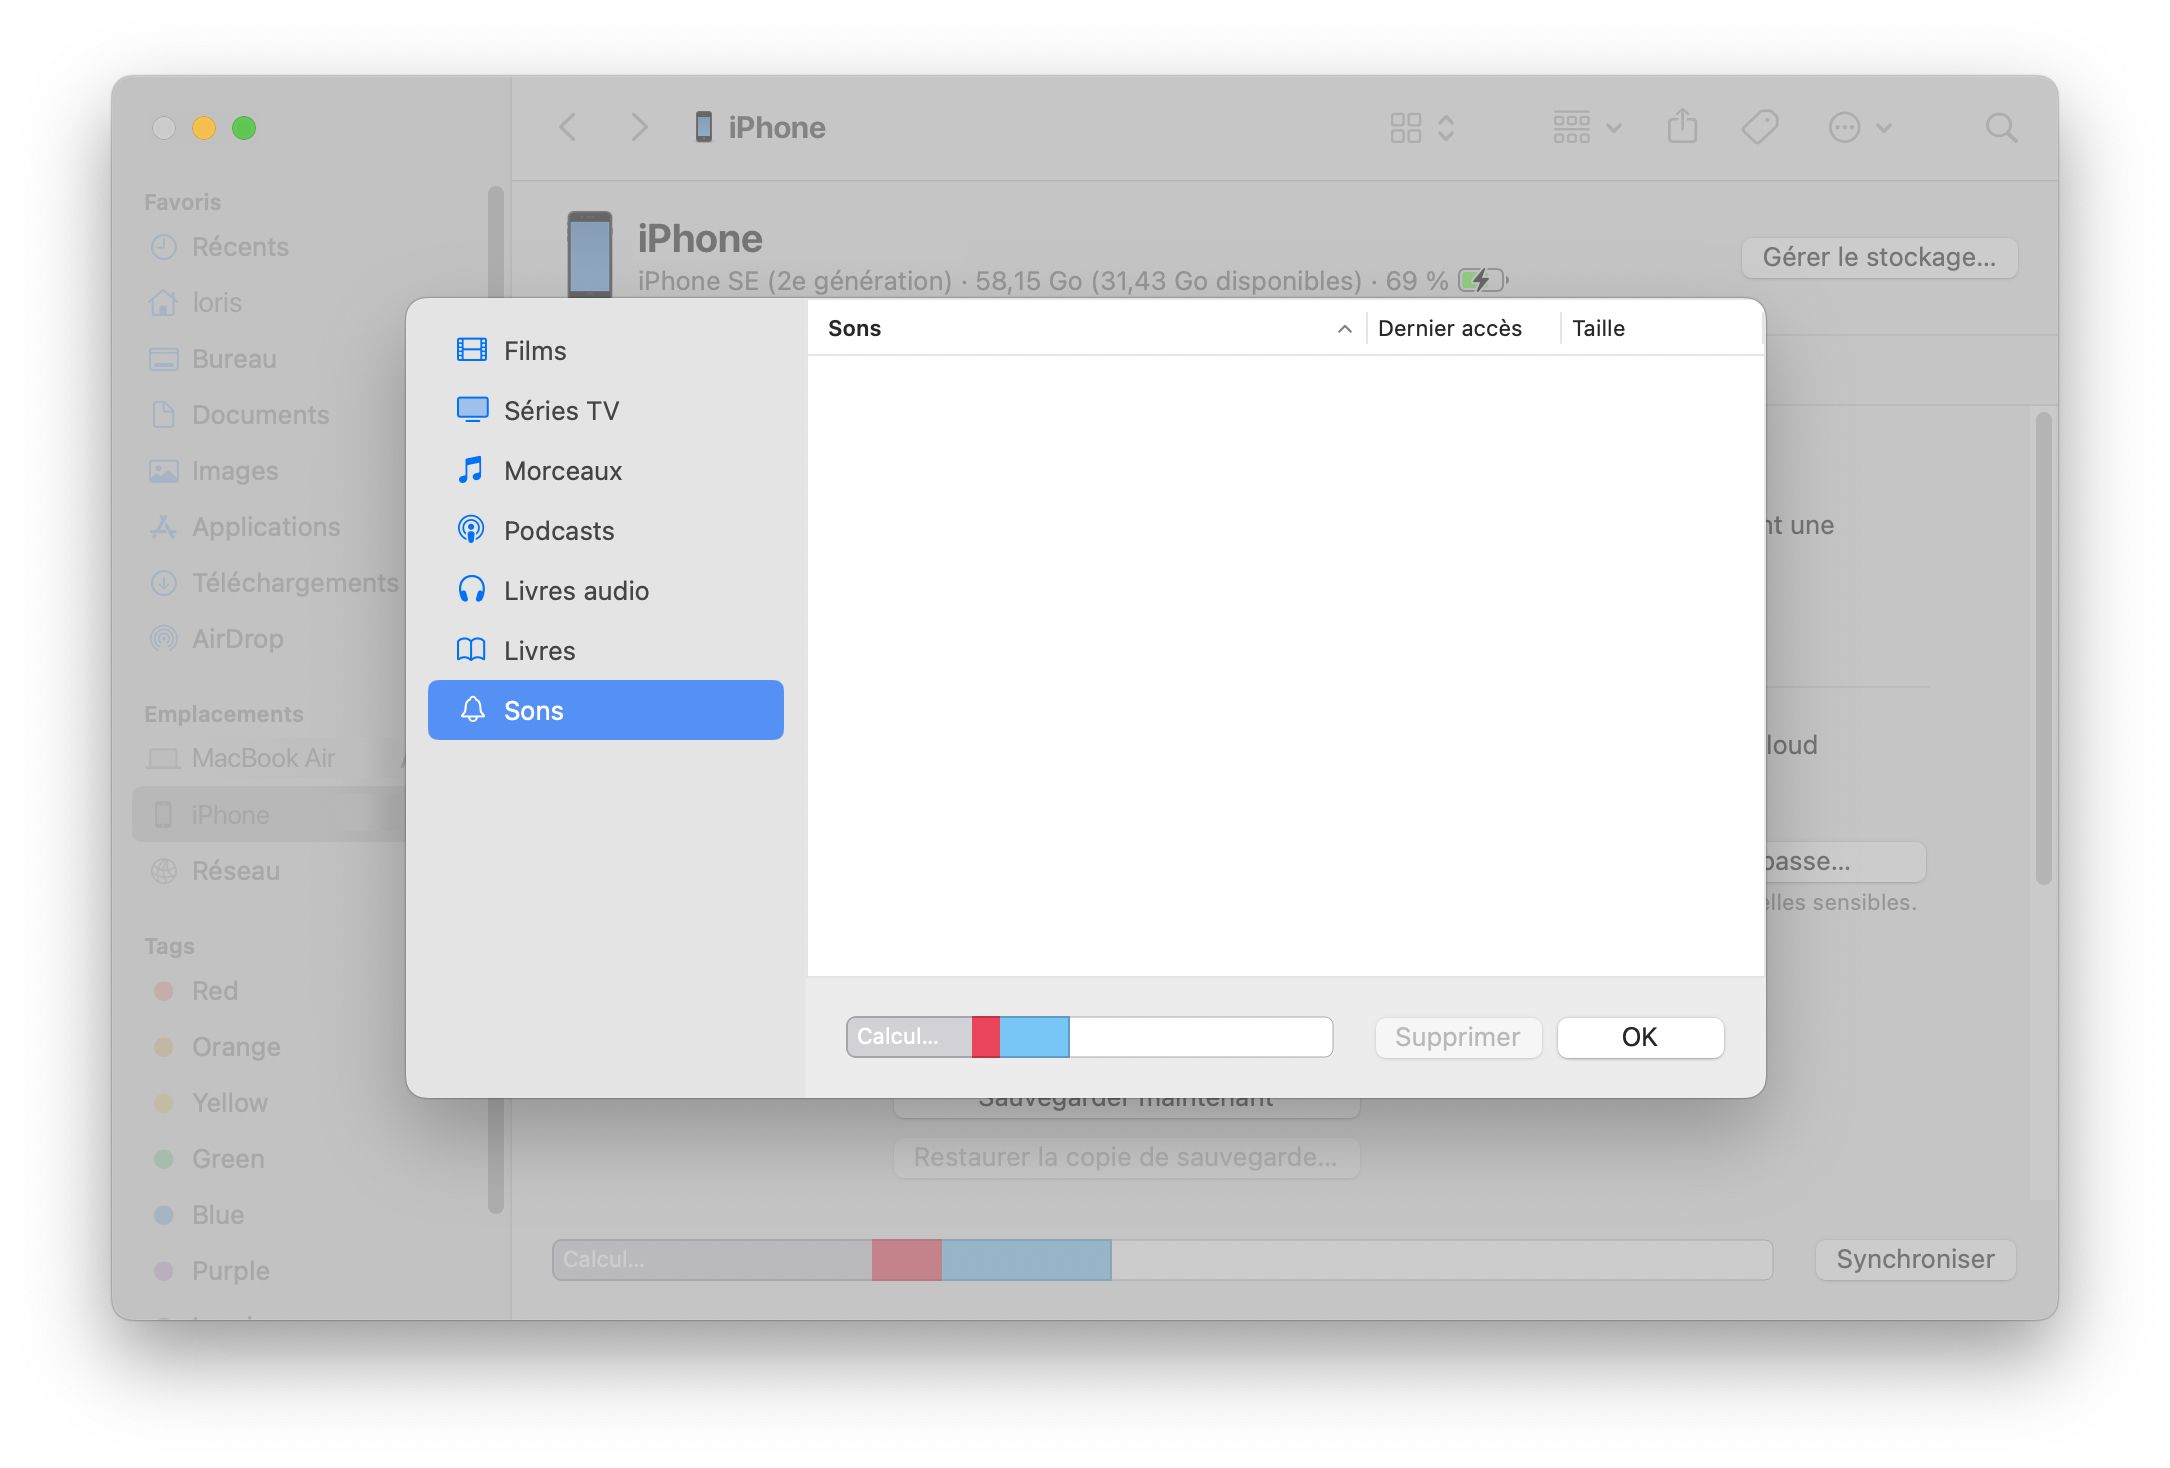
- Drag and drop the .m4r file into the "Sounds" section.
Step 3: Assign the Custom Sound
- Go to Settings > Sounds & Haptics.
- Tap on the notification type you'd like to change (e.g., Text Tone, Mail).
- Your custom sound should appear at the top of the list. Select it.
- The custom sound should be triggered as you select it, ensures that it plays as intended.
Tips for Success
If your sound doesn’t appear, ensure it is in the correct format and re-sync your iPhone.
Enjoy your personalized notification sound!
Links
- Use tones and ringtones with your iPhone or iPad — Apple.com
- Create a custom ringtone on your iPhone with GarageBand — Apple.com
- Use the Finder to sync your iPhone, iPad, or iPod touch with your Mac — Apple.com
- iOS 26: Set a Custom iPhone Ringtone in Seconds — MacRumors
Published on
Updated on
by Loris F.


